
Landscape lighting transforms your property after dark — highlighting architecture, illuminating pathways, and adding security. But even the most beautiful fixtures will underperform or fail prematurely without proper power. Landscape lighting transformer sizing is the critical calculation that determines whether your system shines brightly for years or flickers into an early grave.
An undersized transformer overloads, overheats, and shortens fixture life. An oversized one wastes money. Getting landscape lighting transformer sizing right requires adding up your fixture wattages, accounting for wire losses, and planning for future expansion. This guide walks USA homeowners through every step.
What Does a Landscape Lighting Transformer Do?
Your home’s electrical system delivers 120 volts. Landscape lighting fixtures operate at 12 volts (low voltage) for safety — low enough that accidental contact during gardening will not cause serious shock, and safe for DIY-friendly installation without deep burial requirements.
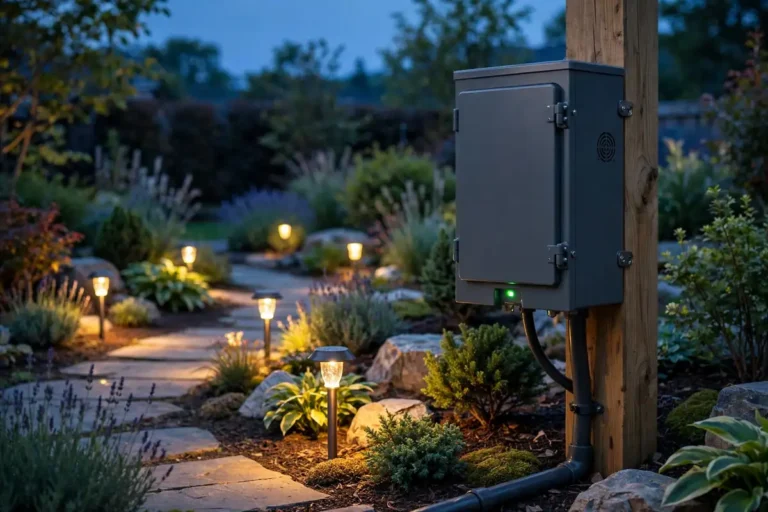
The transformer steps 120V household current down to 12V for your lighting circuits. It mounts on an exterior wall or post near an outdoor GFCI outlet, and from it, low-voltage cable runs to each fixture. Most residential transformers also include a timer or photocell for automatic dusk-to-dawn operation.
Transformer capacity is measured in watts (or volt-amps, VA — effectively the same for this purpose). Common residential sizes are 150W, 300W, 600W, 900W, and 1200W. Choosing the right size starts with knowing your total lighting load.
How to Calculate Your Lighting Load
Proper landscape lighting transformer sizing begins with a fixture inventory. List every light you plan to install (or have installed) with its wattage:
Step 1: Count and catalog fixtures. Walk your planned layout: path lights (typically 3–5W LED each), spotlights/uplights (5–10W LED each), deck lights (2–3W each), well lights (5–8W each), and any specialty fixtures. Note the wattage of each — it is printed on the fixture or packaging.
Step 2: Sum the wattages. Add them all together. Example: 10 path lights × 4W = 40W, plus 6 spotlights × 7W = 42W, plus 8 deck lights × 2W = 16W. Total = 98W.
Step 3: Add a 25% buffer. Never load a transformer beyond 80% of its rated capacity. This safety margin accounts for voltage fluctuations, prevents overheating, and extends transformer life. In our example: 98W ÷ 0.80 = 122.5W minimum transformer size.
Step 4: Add future expansion. Plan for 20–30% growth. You will inevitably want to add lights later — a new garden bed, a seating area, holiday lighting. In our example: 122.5W × 1.25 = 153W. A 150W transformer would be marginal; a 300W unit provides comfortable headroom.
The formula: Transformer size ≥ (Total fixture watts ÷ 0.80) × 1.25
Choosing the Right Transformer Size
Apply the formula to common scenarios:
Small system (5–10 fixtures, all LED): Total load typically 30–60W. A 150W transformer provides ample capacity with room to grow. Do not buy smaller — the price difference between 150W and smaller units is negligible, and you will appreciate the expansion room.
Medium system (15–25 fixtures): Total load typically 80–150W. A 300W transformer is the sweet spot for most suburban USA properties. This handles front and back yards with diverse fixture types.
Large system (30–50 fixtures): Total load typically 150–300W. A 600W transformer, possibly with multiple voltage taps (see below). Large properties or elaborate designs may need this capacity.
Estate/very large (50+ fixtures): Consider multiple transformers rather than one massive unit. Two 600W transformers — one for front yard, one for back — simplify wiring, reduce voltage drop issues, and provide redundancy. If one fails, half your lights still work.
When between sizes, always round up. The cost difference between a 300W and 600W transformer ($50–$100) is trivial compared to replacing an undersized unit later.
Understanding Voltage Drop
Landscape lighting transformer sizing is only half the equation — you must also manage voltage drop. As electricity travels through wire, resistance causes voltage to decrease with distance. A fixture 100 feet from the transformer receives less than 12V, appearing dimmer than one 20 feet away.
LED fixtures tolerate some voltage drop (most operate correctly from 9V to 15V), but excessive drop causes visible dimming and color shift. The goal is keeping every fixture within 10.5V to 12V.
Strategies to minimize voltage drop:
Use heavier gauge wire for long runs. Standard landscape wire is 12-gauge; for runs over 75 feet, consider 10-gauge. The thicker wire has less resistance. Wire is cheap compared to the frustration of dim lights — do not skimp here.
Use the hub wiring method instead of daisy-chaining. In a daisy chain, fixtures connect sequentially along one wire run — the last fixture gets the lowest voltage. In hub wiring, each fixture (or small group) gets a home run back to a central hub near the transformer, equalizing voltage. Hub wiring uses more wire but delivers dramatically more even lighting.
Use multi-tap transformers for large systems. These have 12V, 13V, 14V, and 15V output terminals. Connect long wire runs to higher-voltage taps to compensate for drop — the far fixtures receive a boosted voltage that arrives at the correct 12V after line losses. This is professional-grade technique that solves voltage drop elegantly.
Split into zones. Multiple shorter runs from the transformer (or multiple transformers) keep every run short. This is another argument for two smaller transformers over one large unit on big properties.
Transformer Features Worth Paying For
Not all transformers are equal. When shopping, prioritize these features:
Stainless steel enclosure: Survives decades outdoors. Powder-coated steel is adequate; plastic housings degrade in UV. Given that the transformer lives outside permanently, build quality matters.
Built-in timer and photocell: Astronomical timers (which calculate sunrise/sunset for your location) are superior to simple photocells or manual timers. They adjust automatically through the seasons — no reprogramming as days lengthen and shorten.
Multi-tap outputs: As discussed above, 12V/13V/14V/15V taps give you voltage-drop compensation flexibility. Worth the modest premium on systems with runs over 50 feet.
Toroidal core: Higher-efficiency transformer design that runs cooler, quieter (no humming), and lasts longer than traditional laminated-core units. The hum from cheap transformers can be audible near patios and bedrooms.
Surge protection: Outdoor transformers are lightning targets. Built-in surge suppression — or a whole-house surge protector at your panel — guards the investment. A fried $400 transformer is an avoidable expense.
Installation Basics
Mount the transformer on a sturdy surface — house wall, fence post, or dedicated post — at least 12 inches above ground (to avoid flooding and snow) and within a few feet of a GFCI-protected outdoor outlet. The transformer plugs into the outlet; it does not require hardwiring in most installations.
Run low-voltage cable from the transformer to your fixtures. Direct-burial landscape cable needs only 6 inches of burial depth (versus 18+ inches for 120V), making installation dramatically simpler. Use waterproof wire connectors (grease-filled wire nuts or heat-shrink connectors) at every splice — standard wire nuts corrode outdoors and cause the number one landscape lighting failure: intermittent connections.
While low-voltage landscape lighting is among the most DIY-friendly electrical projects, the 120V outlet powering the transformer must meet code: GFCI-protected, weatherproof cover, proper mounting. If you need a new outdoor outlet installed, that is electrician work — see outdoor lighting installation cost for related pricing and how to hire an electrician for vetting.
LED vs. Halogen: Impact on Sizing
This guide assumes LED fixtures, which dominate the USA market in 2026. LEDs use 75–80% less power than equivalent halogens — a 7W LED spotlight replaces a 35W halogen. This dramatically reduces transformer sizing requirements.
If you have an existing halogen system and are considering LED retrofit, your transformer is likely oversized for the new load — which is fine. Transformers handle lighter loads without issue. The retrofit itself pays for itself quickly: lower energy bills, far less frequent bulb replacement (LEDs last 25,000–50,000 hours versus 2,000 for halogen), and cooler operation that is safer near plants and mulch.
When calculating for a new system, always use the actual LED wattages, not “halogen equivalent” figures. Marketing often touts “35W equivalent” — for sizing math, only the real 7W consumption matters.
Maintenance and Troubleshooting
Annual maintenance: Clean fixture lenses (dirt accumulation significantly reduces output), trim vegetation blocking lights, check wire connections for corrosion, verify the timer/photocell operates correctly, and confirm the transformer is not overloaded after adding fixtures.
Dim or flickering fixtures: Usually voltage drop (add a higher tap or shorten the run), a failing wire connection (inspect and replace connectors), or an overloaded transformer (calculate load — you may have exceeded 80% capacity by adding fixtures over time).
Entire zone out: Check the transformer’s circuit breaker and GFCI outlet first. Then check for a severed wire (gardening tools are the usual culprit). A cable locator or tone generator helps find breaks in buried wire.
Transformer humming loudly or hot: May indicate overloading. Calculate your total load immediately. If within capacity, the transformer may be failing — toroidal-core units should run nearly silent and barely warm.
Cost Overview
Transformer: $80–$150 (150W), $120–$250 (300W), $200–$400 (600W), $300–$600 (900W+). Stainless steel, multi-tap, toroidal-core units command premium prices worth paying.
Wire: $0.50–$1.00 per foot for 12-gauge direct-burial cable. A typical residential project uses 200–500 feet.
Professional installation (if you do not DIY the low-voltage portion): $1,500–$4,000 for a complete system including fixtures, or $500–$1,000 for transformer and wiring rough-in if you install fixtures yourself.
Frequently Asked Questions
Can I use one transformer for front and back yards?
Yes, if the total load fits within 80% of capacity and wire runs are manageable. For large properties, two smaller transformers often work better than one large unit — shorter runs, less voltage drop, and redundancy.
What happens if I overload the transformer?
Most quality transformers have thermal overload protection that shuts them down before damage occurs. Chronic overloading shortens transformer life and causes dim, unreliable lighting. Size correctly from the start.
Do I need a permit for landscape lighting?
Low-voltage landscape lighting typically does not require a permit in most US jurisdictions. However, installing the 120V GFCI outlet that powers the transformer does require a permit and electrician in most areas. Check local rules — see electrical code requirements by state for the broader regulatory picture.
Proper landscape lighting transformer sizing is the invisible foundation of a stunning outdoor lighting system. Do the math, add your buffers, buy quality equipment, and your landscape will glow beautifully for decades.
Integrating Landscape Lighting With Your Home’s Electrical System
Your landscape lighting does not exist in isolation — it is part of your home’s overall electrical ecosystem. The GFCI outlet powering your transformer should be on a properly sized circuit; if outdoor outlets trip frequently, consult how to troubleshoot a tripped breaker before assuming the transformer is at fault. Homes with extensive outdoor electrical — lighting, hot tubs, pool equipment, workshops — should verify the main panel has adequate capacity via our electrical panel upgrade guide.
Protect the investment: a whole-house surge protector guards your transformer and fixtures against lightning-induced surges, which are the leading killer of outdoor transformers in storm-prone states. If you are expanding outdoor electrical beyond lighting, our outdoor lighting installation cost guide covers the 120V side of the project, including trenching, conduit, and code requirements. And whenever you touch outdoor electrical, refresh yourself on electrical code requirements by state — burial depths and GFCI rules vary by jurisdiction.